TLDR: If you know what you are doing and just can't get your maps to load:
1. Source overlay image must be less or equal to 1024 x 1024
2. Source overlay image must encoded as Not Progressive
Software
This guide will allow you to load custom satellite maps on your Garmin Fenix 5X with free software. In order to do this, you will need the following:
- Gimp for editing images
- Google Earth Pro
Thats it!
Google Earth Pro
- Open google earth pro
- Under "Layers" turn off terrain, and other features if you do not want them in your final map
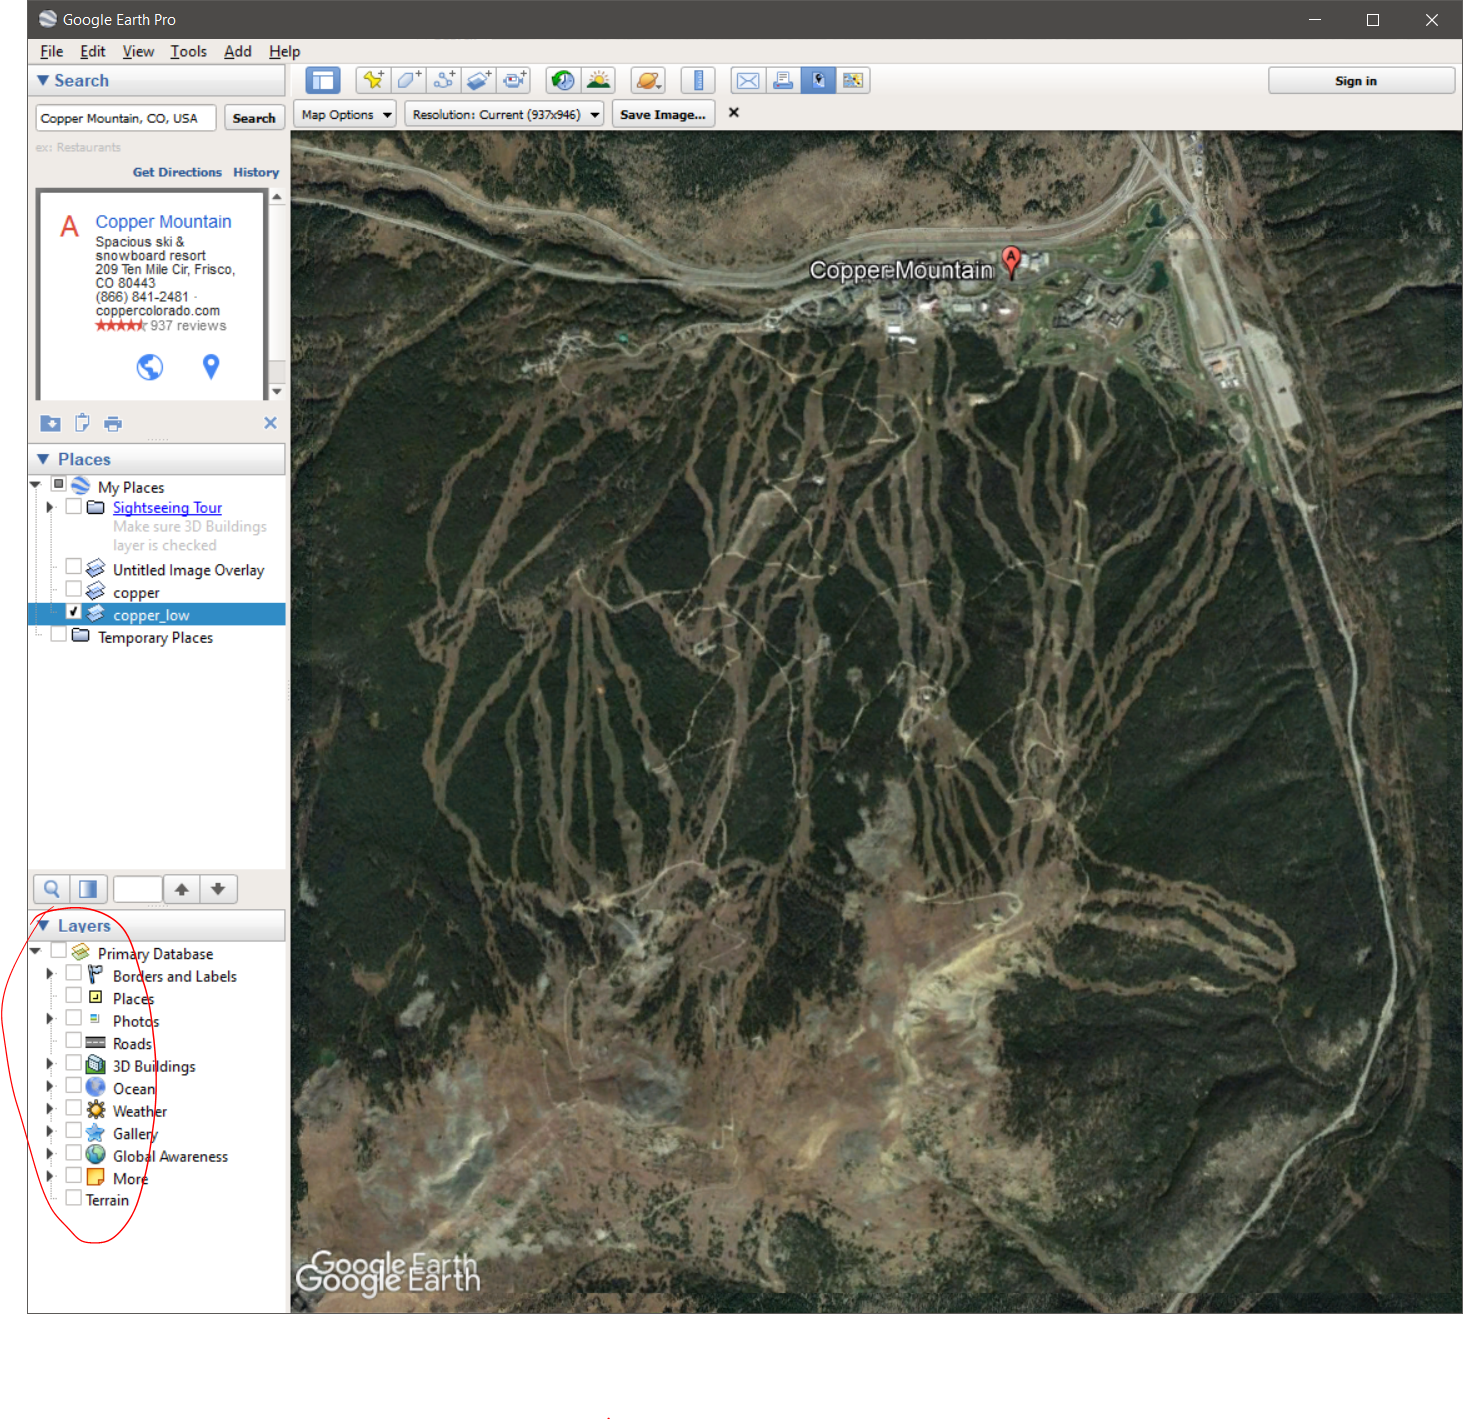
- Select the Save image icon, and be sure your resolution is no more than
1024 x 1024. - Anything above
1024 x 1024will cause the map not to render on the device.

- Turn off all the map options
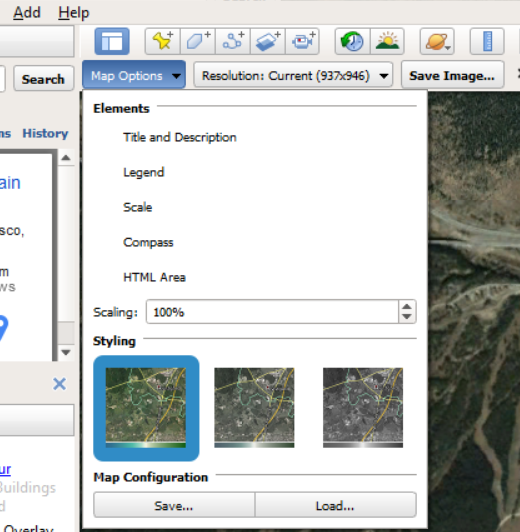
- click Save Image
- I will call my image
copper.jpg
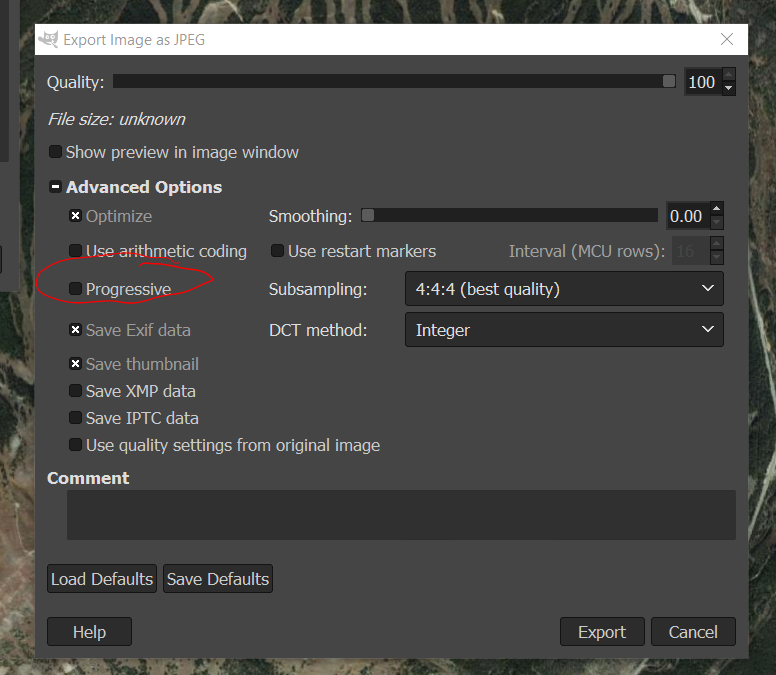
Gimp
- Open Gimp
- Open your image, in my case
copper.jpg - Go to File then Export As
- Then click Advanced Options
- Make sure
Progressiveis Unchecked otherwise the Garmin unit will not load the map. Override your old image
Back to Google Earth Pro
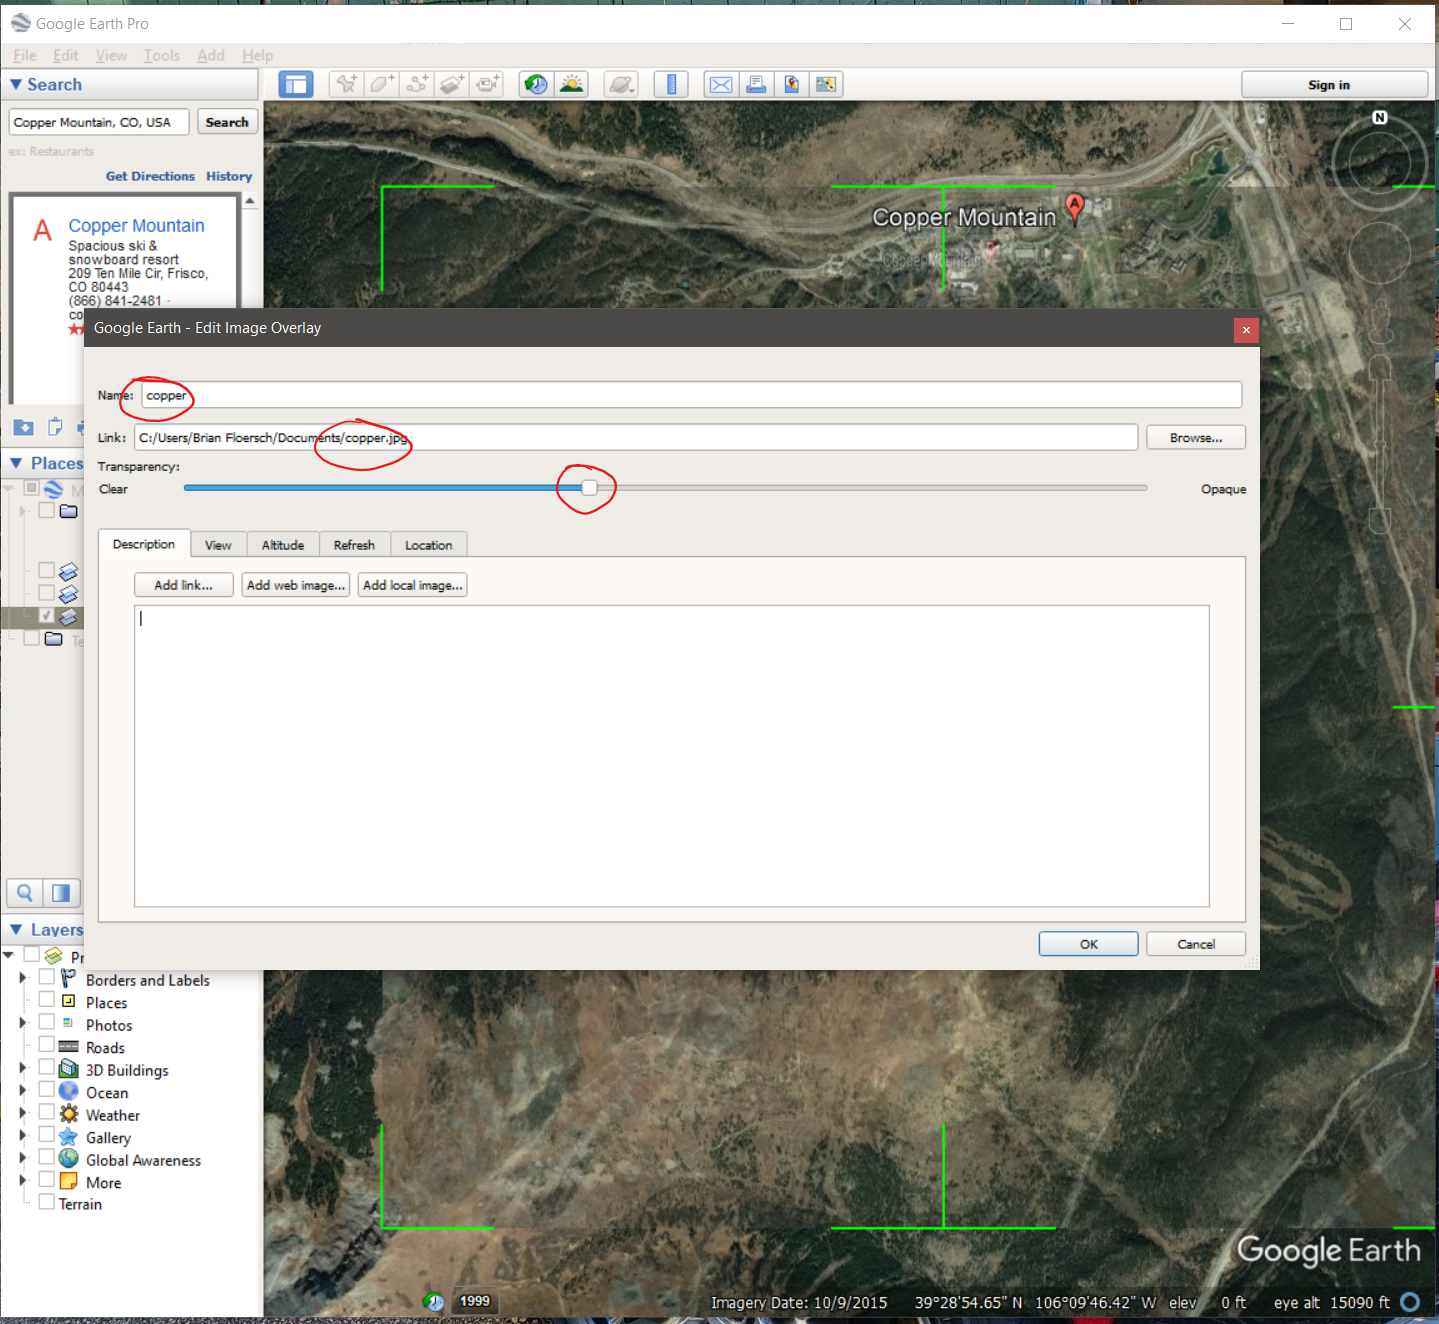
- Back in google Earth, Click the Add Image Overlay button

- Set the Name
- Select the image you just exported
- set the transparency to around
50% - Don't close this window yet! Just move it out of the way.
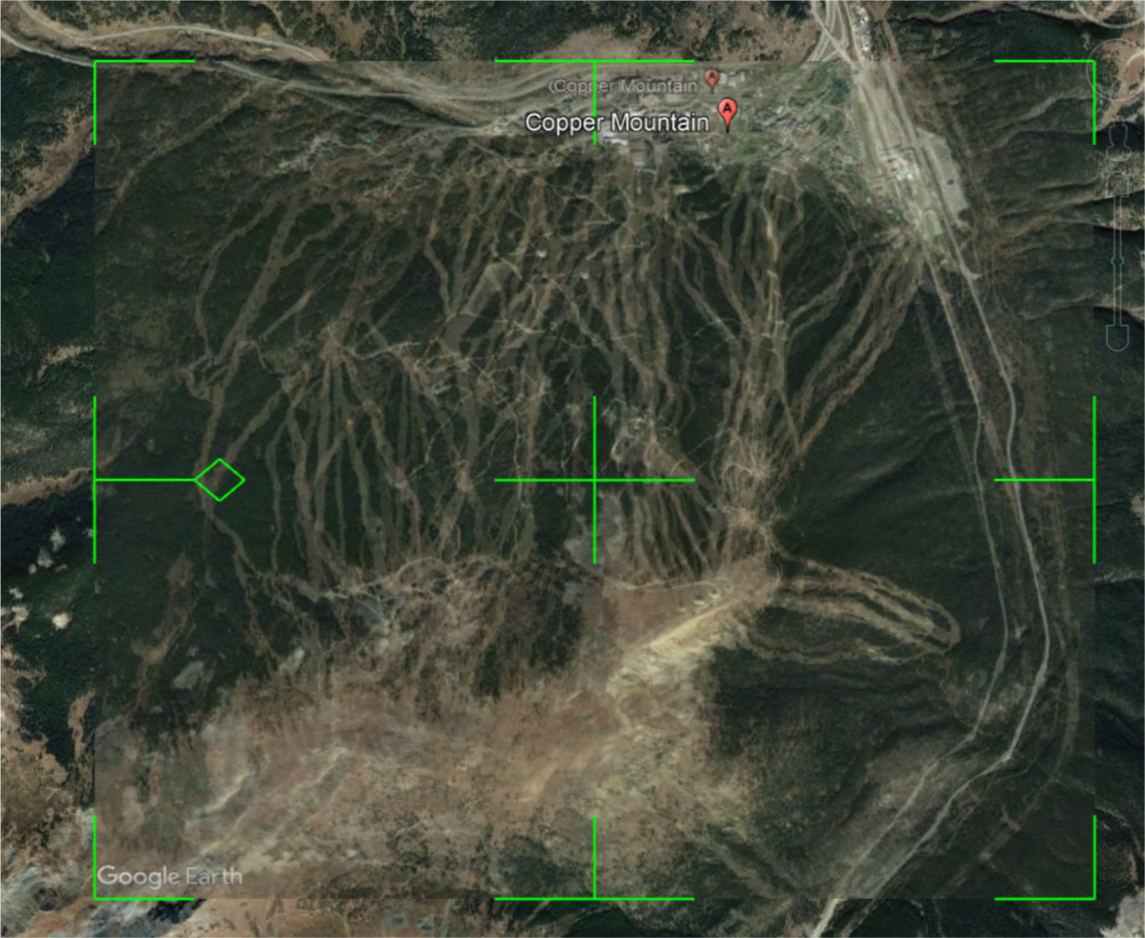
- Align your image. At first it will be out of alignment.
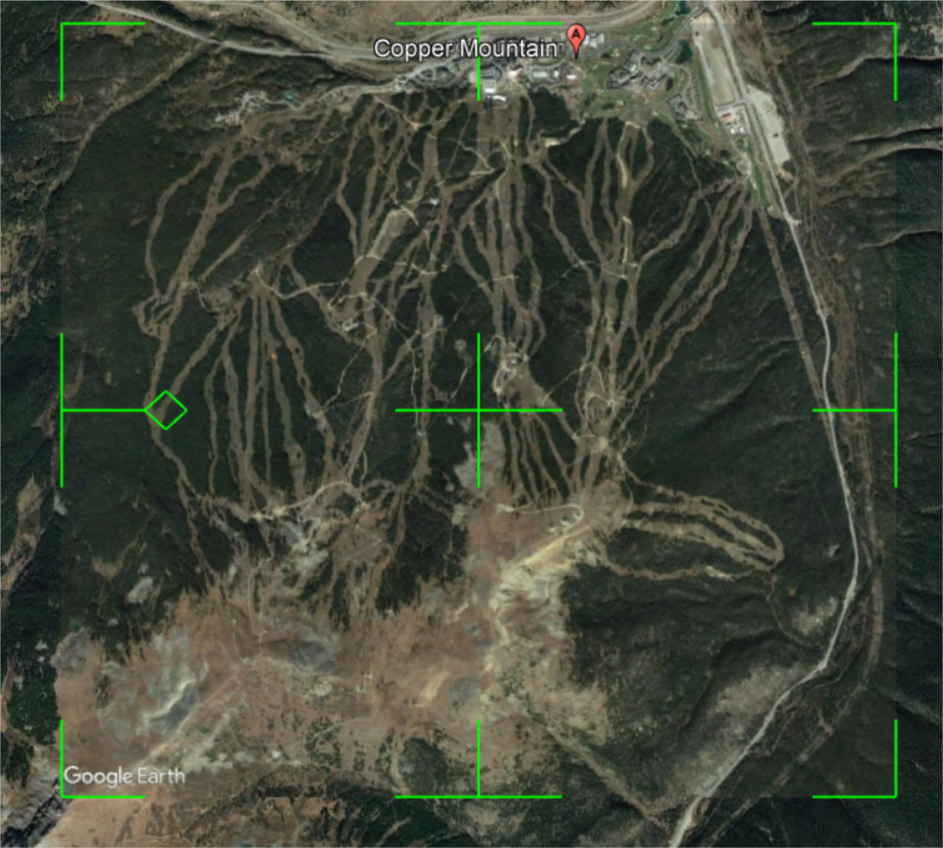
- Once it is aligned you are done, you can click Ok to close the image overlay dialog.
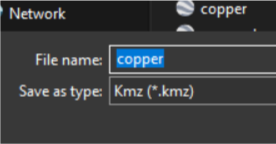
- Right click on your new place and Save Place As
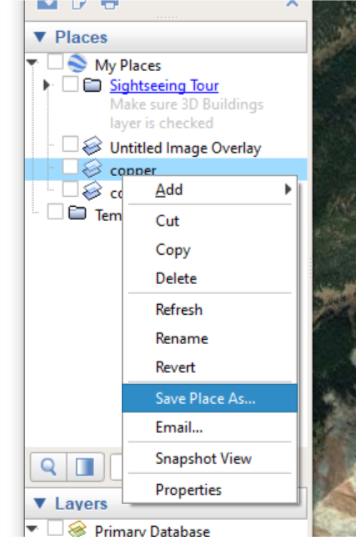
Save as type kmz
Upload to GPS
This is the easy part.
- Plug in your Garmin to your PC
- Navigate to
/Garmin/CustomMapsand drop your new.kmzfile in there. - Unplug the watch
- On the watch navigate to Maps > Menu > Map Settings > Map > Configure Maps
- At the bottom Custom Maps should be a new option.
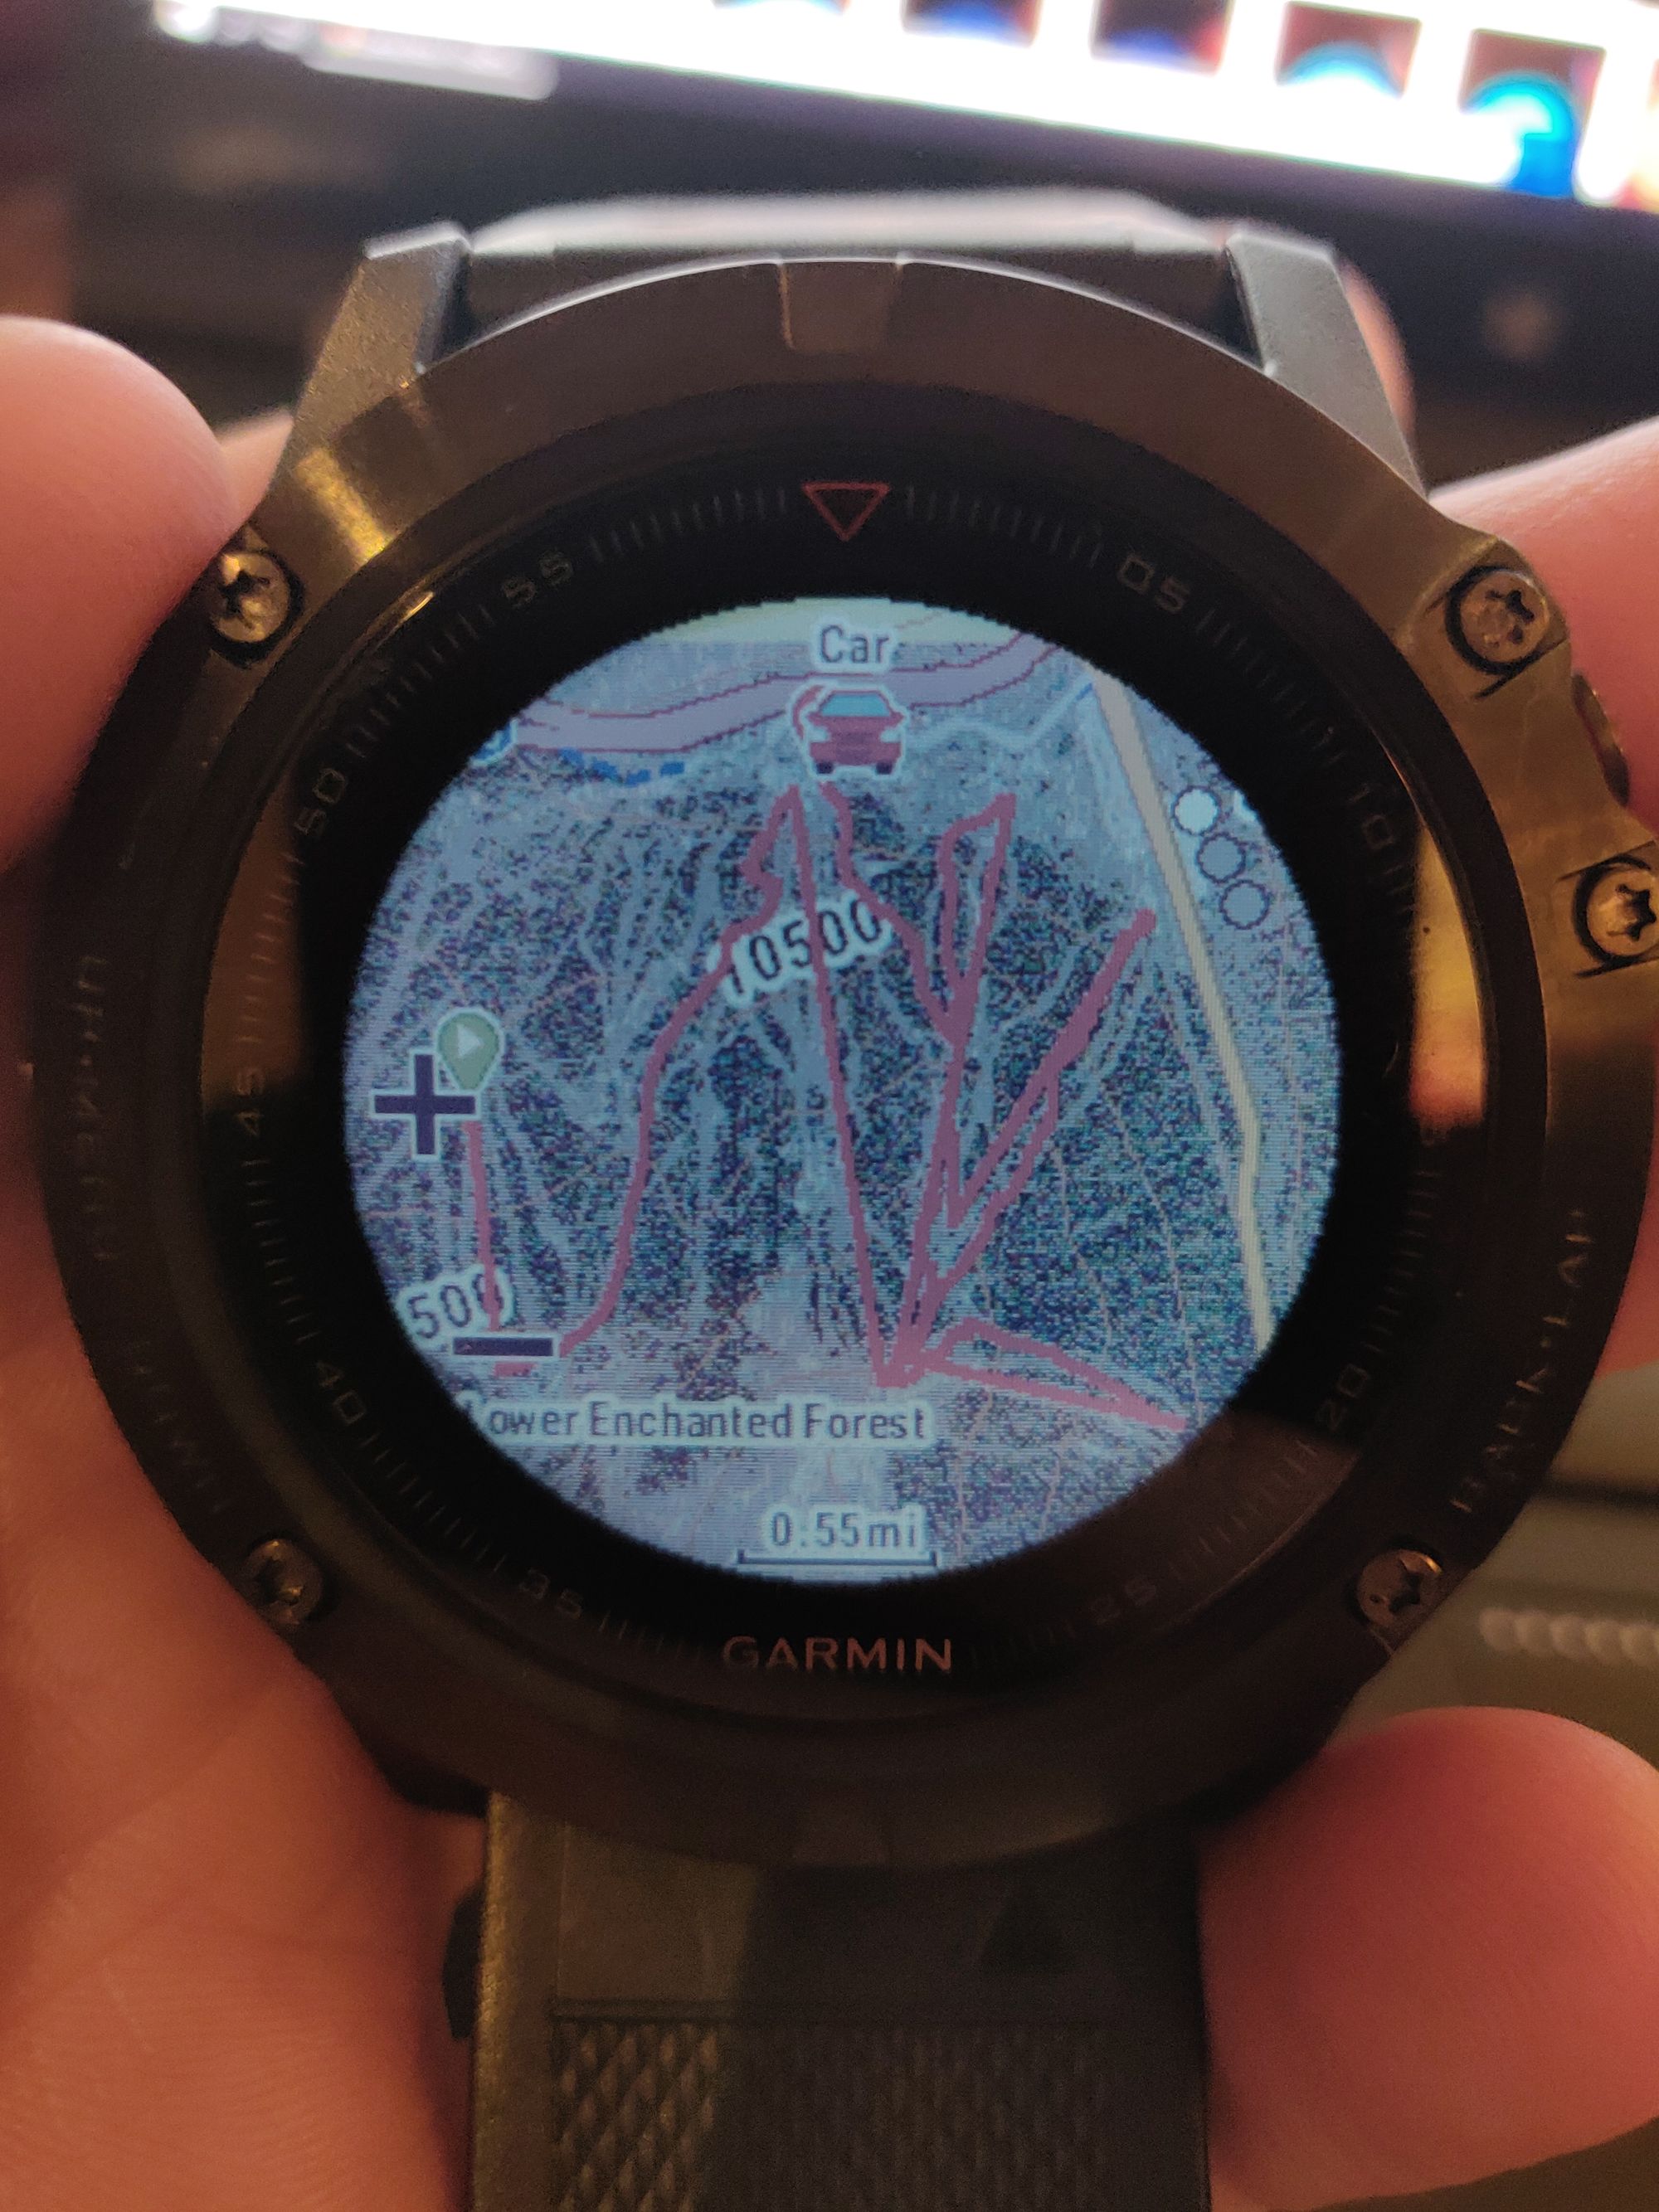
- Select it and ensure your map is enabled. Enjoy GPS maps from google!